
An under-counter water dispenser may fit inside a cabinet yet still be unsuitable for the site. Water pressure, electrical supply, tap mounting, ventilation and maintenance access all need checking before the cabinet and plumbing are finalized.
Quick answer: For under-counter water dispenser installation, record the site’s water pressure and electrical supply, measure the usable cabinet space, and confirm the faucet opening, airflow, drainage and service access against the selected model’s instructions. For multifunctional systems, check every module separately.
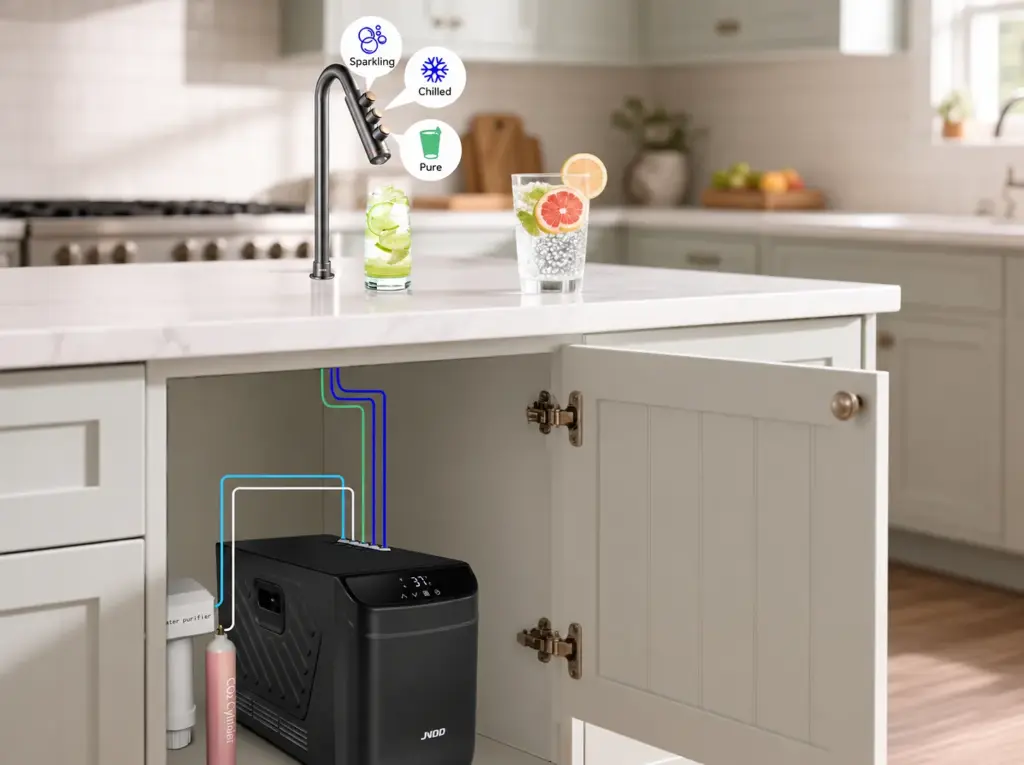
Water Supply and Pressure Requirements
Start with a potable cold-water connection, an accessible shut-off valve and a supply that meets the equipment’s pressure and flow requirements.
Measure static pressure with no water flowing and dynamic pressure while water is being drawn. A reading taken with every outlet closed may not represent conditions during a busy office lunch period.
Record where the pressure was measured and whether other taps were operating. If supply pressure changes noticeably during peak demand, a single static reading is not enough to approve the installation.
Confirm the minimum flow needed by the selected dispenser as well as its permitted pressure range.
Check the inlet fitting, required backflow protection and whether a filter or pressure-control device changes the available flow. Local plumbing rules and the manufacturer’s installation documents take priority over generic recommendations.
JNOD Example: A 0.5 MPa Supply
JNOD’s 6-in-1 under-sink drinking water system lists separate specifications for two modules:
- B30EE-E hot-water module: 0.15–0.6 MPa (1.5–6 bar); rated power 1500W.
- SC27DE-i chilled and sparkling module: 0.15–0.4 MPa (1.5–4 bar); rated power 185W.
Suppose the site’s measured static supply pressure is 0.5 MPa (5 bar).
That is within the hot-water module’s range but above the chilled and sparkling module’s 0.4 MPa maximum. If both modules share this supply, the installation cannot be approved on the hot-water specification alone.
A suitable pressure-control arrangement must be confirmed with the manufacturer, followed by checks that pressure and flow remain adequate during dispensing.
These figures are specific to the listed JNOD modules, not universal limits for under-counter dispensers.
Electrical Supply and Circuit Checks
Verify voltage, frequency, rated power and connection method for the exact model and destination market.
JNOD’s example system lists 110–127V / 60Hz and 220–240V / 50Hz versions. One version must not be connected to a supply intended for the other.
The 1500W heating module and 185W chilled and sparkling module also illustrate why installers must consider the complete connected load.
A qualified electrician should determine circuit capacity, protective devices and any relevant starting currents or simultaneous-load conditions from the product documents and local electrical rules.
For equipment sold in different countries, check the label on the actual shipped unit rather than relying only on a catalogue listing. A matching voltage does not confirm that the frequency, plug, earthing arrangement or circuit protection is correct.
Position electrical connections where they remain appropriately accessible and protected from leaks and condensation.
Do not assume that an existing socket has sufficient capacity simply because it is close to the cabinet.
Cabinet Space, Faucet Mounting and Ventilation
Measure usable internal width, depth and height, not just the cabinet’s nominal dimensions.
Account for hinges, pipework, filters, a possible CO₂ cylinder and the space needed to remove or service components.
Cabinet Support and Maintenance Access
Check that the cabinet base or mounting structure can support the installed weight, including water inside tanks and any equipment it carries. A dry shipping weight may underestimate the load in use.
A useful test is to sketch the installed layout with the cabinet door open: show which way a cartridge is withdrawn, where a hose disconnects and how the refrigeration unit could be removed if servicing is necessary.
Allow access for the person carrying out that work, not just for the equipment itself.
Make sure service personnel can reach the water isolation valve, filter cartridges and electrical isolation point. If a filter cannot be replaced without removing the chiller, the layout needs revision before installation.
Faucet Opening and Hose Routing
Confirm the tap’s mounting-hole diameter, permissible countertop thickness, fixing clearance and position relative to the sink.
Use the drawing for the actual faucet model; another tap’s cutout dimensions may differ.
Measure the route from tap to equipment. Water hoses and control cables need adequate length without sharp bends, crushing or tension.
Do not extend a connection beyond the manufacturer’s approved arrangement merely to accommodate the cabinet design.
Ventilation and Refrigerant Safety
A chilled-water unit releases heat into its surroundings.
Restricted cabinet airflow can impair cooling, so verify the specified air inlet, warm-air outlet and minimum clearances. There is no universal ventilation gap for every under-counter chiller.
The JNOD SC27DE-i specification lists R290/R600a refrigerant options.
Where a selected unit uses a flammable refrigerant, its model-specific installation and safety instructions must govern placement, ventilation and servicing. Do not block designed airflow paths.
JNOD’s commercial water dispenser for office guide covers broader equipment-selection considerations; this checklist focuses on whether a chosen model fits the actual site.
Drainage, Water Treatment and CO₂ Connections
Drainage depends on configuration.
A removable drip tray may not require a permanent waste connection, while an overflow arrangement or reverse osmosis (RO) system may.
Where RO is fitted, plan for the concentrate-water line and its approved drain connection.
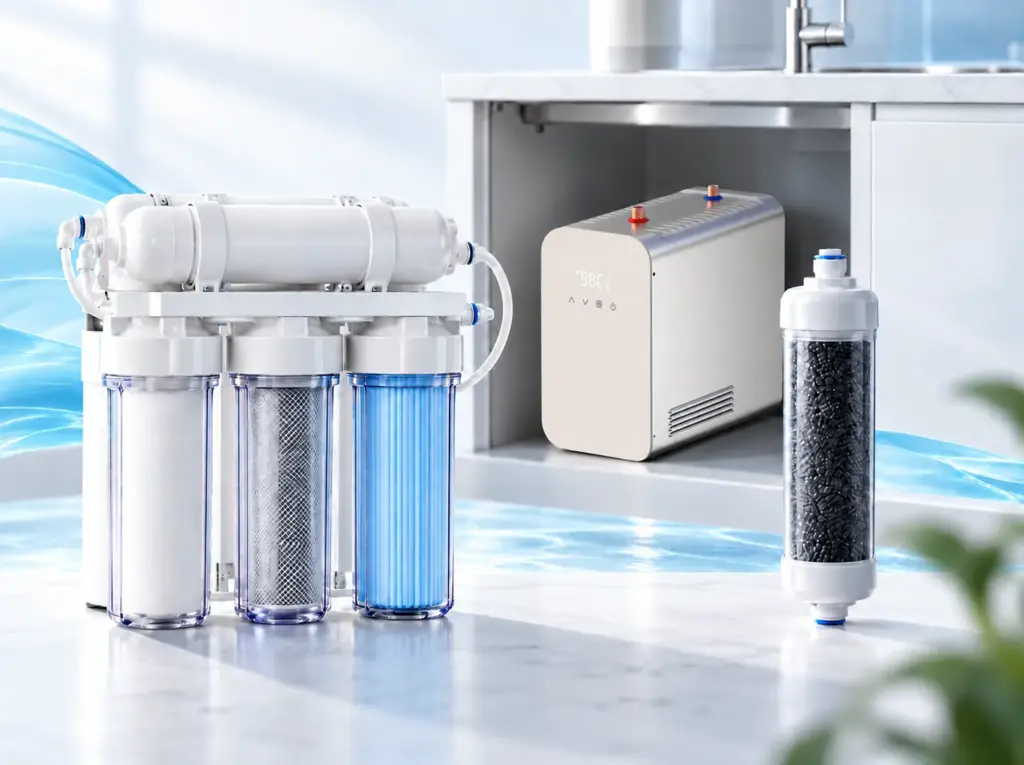
Water quality also affects filtration choice and maintenance.
The CDC’s guidance on choosing water filters recommends selecting treatment based on the contaminants of concern rather than assuming every filter performs the same job.
Reserve room for cartridge replacement and any required upstream treatment.
CO₂ Safety for Sparkling Water Systems
For sparkling water, confirm the food-grade CO₂ cylinder, compatible regulator, gas tubing and cylinder replacement access.
Check how a full cylinder will be brought into the cabinet and how an empty one will be removed. The replacement route should not require moving live electrical equipment or disturbing drinking-water connections.
Secure the cylinder as instructed and assess ventilation for the installation space.
CO₂ leaks can create an asphyxiation hazard in poorly ventilated areas.
The British Compressed Gases Association’s beverage-gas guidance explains these risks.
Gas pressure settings, tubing specifications and any detection requirements are equipment- and site-specific. Obtain the approved requirements rather than selecting a generic regulator pressure.
Under-Counter Water Dispenser Installation Checklist
Use this table during the site survey.
Record the actual measurement or document reference, then mark each item Pass or Review. Leave the status blank until it has been checked.
| Check Item | Site Measurement or Evidence | Status |
|---|---|---|
| Water connection | Potable inlet, fitting size, accessible shut-off valve | |
| Water pressure | Static and flowing pressure versus model limits | |
| Electrical supply | Voltage, frequency, load, circuit protection | |
| Cabinet fit and support | Usable dimensions, installed weight, service clearance | |
| Faucet mounting | Hole size, countertop thickness, fixing access | |
| Hose and cable routing | Approved lengths, bend radius, connection access | |
| Ventilation and refrigerant | Required openings, clearances, safety instructions | |
| Drainage and filtration | Waste connection if required, filter access, water quality | |
| CO₂ installation | Cylinder restraint, regulator, ventilation, replacement access | |
| Documentation | Correct model drawings and applicable local requirements |
Pass means the site meets the documented requirement.
Review means a limit is exceeded, evidence is missing or the proposed arrangement needs approval. A Review item is not permission to proceed.
For a broader comparison of water types and capacities before choosing equipment, see JNOD’s commercial water dispenser buying guide.
Final Checks Before Commissioning
Once the installation is complete, qualified personnel should follow the manufacturer’s commissioning procedure.
Check water connections for leaks; flush or sanitize the system and prepare filters where specified. Confirm adequate pressure during dispensing and clear airflow around the refrigeration unit.
Where sparkling water is provided, verify the CO₂ connection and safety measures using approved procedures.
Test the intended water functions, then close the cabinet and check that valves, filters, the cylinder and electrical isolation remain accessible.
Keep the model-specific installation instructions and commissioning record with the project handover documents. If readings or connections differ from the approved design, resolve the discrepancy before the system is put into regular service.
For multi-site rollouts, record model numbers, measured conditions and outstanding actions for each location. A repeated cabinet design does not guarantee identical water or electrical conditions.
Planning for Commercial and OEM Projects
Distributors, kitchen brands and contractors should request dimensional drawings, faucet cutout details, electrical ratings, water connection specifications and ventilation instructions before confirming cabinetry.
Custom taps, filtration layouts or enclosures may change installation requirements; discuss these changes during the JNOD OEM/ODM planning process.
Final Thoughts
A good installation checklist identifies incompatibilities before work begins.
Match the site to the complete selected system, not just the cabinet dimensions or one module’s specifications.
For model-specific drawings and requirements, contact JNOD before finalizing your project.
 English
 Arabic
 Russian
 Spanish